 |
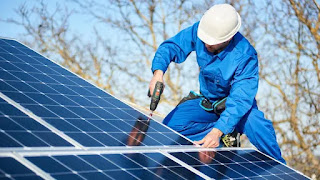
| Solar panel installation |
A Comprehensive Guide to Solar Panel Installation
In the wake of rising energy costs and growing environmental concerns, many homeowners are turning to solar energy as a sustainable and cost-effective solution. Installing solar panels can significantly reduce your electricity bills and your carbon footprint. This guide will walk you through everything you need to know about solar panel installation, from planning to maintenance, ensuring you can make an informed decision and start harnessing the power of the sun.
### Why Go Solar?
#### 1. **Cost Savings**
One of the most compelling reasons to install solar panels is the potential for substantial cost savings. By generating your own electricity, you can reduce or even eliminate your monthly utility bills. Many regions also offer incentives and rebates that can offset the initial installation costs.
#### 2. **Environmental Benefits**
Solar energy is a clean, renewable source of power that reduces greenhouse gas emissions and dependence on fossil fuels. Installing solar panels helps lower your carbon footprint and contributes to a greener planet.
#### 3. **Energy Independence**
With solar panels, you generate your own electricity and are less reliant on the grid. This can be especially beneficial in areas with frequent power outages or high energy costs.
#### 4. **Increased Property Value**
Homes equipped with solar panels often see an increase in property value. Potential buyers are attracted to the prospect of lower energy bills and the eco-friendly benefits of solar power.
### Planning Your Solar Panel Installation
#### 1. **Assess Your Energy Needs**
Start by evaluating your current energy consumption. Look at your electricity bills to understand your usage patterns and determine how much power you need to generate to meet your needs.
#### 2. **Evaluate Your Roof’s Suitability**
Not all roofs are ideal for solar panels. Consider the following factors:
- **Orientation and Tilt**: South-facing roofs with a tilt angle between 15 and 40 degrees are optimal for solar panels in the Northern Hemisphere.
- **Shade**: Ensure your roof receives adequate sunlight throughout the day, without obstructions from trees or other structures.
- **Space**: Make sure there is enough space on your roof to accommodate the number of panels you need.
#### 3. **Calculate Potential Savings**
Use online solar calculators or consult with a professional to estimate your potential savings. Consider factors like the cost of electricity in your area, available incentives, and your system’s expected performance.
### Choosing the Right Solar Panels
#### 1. **Types of Solar Panels**
- **Monocrystalline Panels**: Known for their high efficiency and sleek design, these panels are ideal for homes with limited roof space.
- **Polycrystalline Panels**: Slightly less efficient but more cost-effective, these panels are a popular choice for residential installations.
- **Thin-Film Panels**: Flexible and lightweight, thin-film panels are less efficient but can be used in diverse applications where traditional panels aren’t suitable.
#### 2. **Quality and Warranty**
Choose high-quality panels from reputable manufacturers. Look for panels with a strong warranty (typically 25 years) to ensure long-term performance and reliability.
#### 3. **Inverters and Batteries**
Inverters convert the direct current (DC) generated by the panels into alternating current (AC) used in your home. Consider adding battery storage to store excess energy for use during cloudy days or at night.
### Hiring a Professional Installer
#### 1. **Research and Compare**
Get quotes from multiple installers and compare their offerings. Look for certified installers with experience and positive customer reviews.
#### 2. **Check Credentials**
Ensure your installer is licensed and certified by recognized industry bodies, such as the North American Board of Certified Energy Practitioners (NABCEP).
#### 3. **Review Contracts**
Carefully review the installation contract to understand the scope of work, timelines, costs, and warranty terms. Make sure all details are clearly outlined.
### Installation Process
#### 1. **Site Assessment**
The installer will conduct a site assessment to evaluate your roof’s suitability and determine the best placement for the panels.
#### 2. **Design and Permitting**
Based on the site assessment, the installer will design your solar panel system and obtain the necessary permits from local authorities.
#### 3. **Installation**
The installation typically takes a few days and involves mounting the panels on your roof, connecting the inverter, and setting up any necessary electrical work.
#### 4. **Inspection and Activation**
After installation, the system will undergo a final inspection to ensure it meets all safety and performance standards. Once approved, your system can be activated and connected to the grid.
### Maintenance and Monitoring
#### 1. **Regular Cleaning**
Keep your panels clean and free of debris to maintain optimal performance. In most areas, rain will suffice, but in dusty regions, occasional manual cleaning may be necessary.
#### 2. **Monitoring Performance**
Many systems come with monitoring software that allows you to track your system’s performance and energy production in real time.
#### 3. **Annual Check-ups**
Schedule annual inspections with your installer to ensure your system is functioning correctly and efficiently.
### Conclusion
Installing solar panels is a smart investment that offers financial savings, energy independence, and environmental benefits. By understanding the process and planning carefully, you can make the most of your solar installation and enjoy the benefits of clean, renewable energy for years to come.
